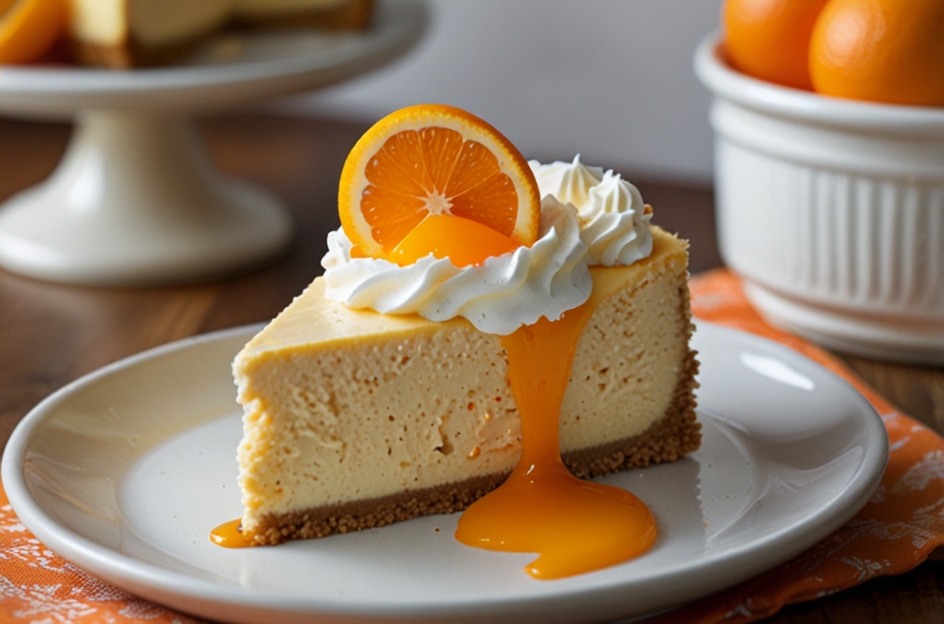
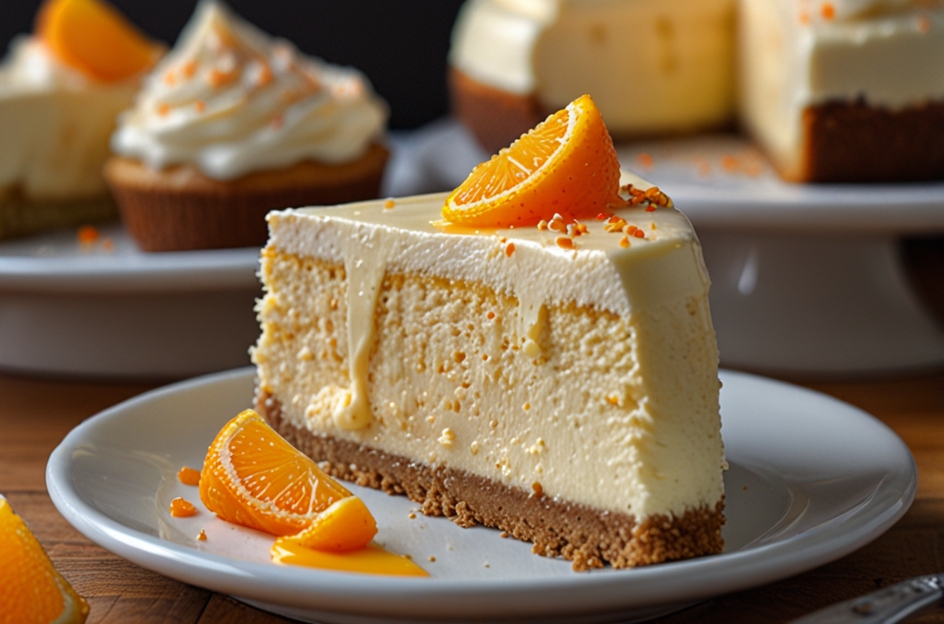
orange creamsicle cheesecake
When it comes to desserts that evoke memories of carefree summer days, nothing quite captures that nostalgia like an orange creamsicle. Remember those hot afternoons spent licking that icy treat on a stick, the sweet and tangy flavor dancing on your tongue? Now, imagine transforming that delightful experience into a rich, creamy cheesecake! Yes, that’s right! The orange creamsicle cheesecake is here to take you on a delightful flavor journey, blending the classic flavors of orange and vanilla with a creamy, decadent base. This article will explore everything you need to know about making, enjoying, and even personalizing this scrumptious dessert. So, grab your aprons, and let’s dive in!
Table of Contents
| Sr# | Headings |
|---|---|
| 1 | The History of Cheesecake |
| 2 | Why Orange Creamsicle? |
| 3 | Essential Ingredients for Orange Creamsicle Cheesecake |
| 4 | Step-by-Step Instructions for Making the Cheesecake |
| 5 | Tips and Tricks for the Perfect Cheesecake |
| 6 | Variations on Orange Creamsicle Cheesecake |
| 7 | Serving Suggestions and Pairings |
| 8 | Storing and Reheating Your Cheesecake |
| 9 | Conclusion |
| 10 | Frequently Asked Questions |
The History of Cheesecake
Cheesecake is one of those delightful desserts with a rich history that spans centuries. Its roots trace back to ancient Greece, where the first known cheesecakes were made using simple ingredients: cheese, flour, and honey. As time went on, this dessert evolved, making its way through various cultures, each adding their unique twist. The Romans were among the first to introduce cheesecake to other parts of Europe, adapting the recipe to include ingredients like eggs and cream.
Fast forward to the 19th century, and we find the introduction of cream cheese, which revolutionized cheesecake as we know it today. It made the dessert smoother and creamier, providing a perfect base for a myriad of flavors. Today, you can find cheesecakes in countless varieties, from classic New York-style to fruity options, like our star of the show: orange creamsicle cheesecake.
You might wonder, why is cheesecake so beloved? It’s the perfect blend of creamy, tangy, and sweet flavors that keep dessert lovers coming back for more. Whether it’s a celebratory birthday cake or a sweet treat after dinner, cheesecake has a way of making every occasion a little more special. So, when you whip up an orange creamsicle cheesecake, you’re not just making a dessert; you’re creating a slice of history infused with nostalgia and joy.
Why Orange Creamsicle?
The orange creamsicle is a classic frozen treat that many of us grew up enjoying. The combination of orange and vanilla flavors is not just refreshing; it’s a beautiful harmony that sings of sunny days and lazy afternoons. So why not translate that beloved flavor into a cheesecake?
This dessert offers a delightful contrast between the creamy richness of the cheesecake and the bright, zesty notes of orange. It’s like a summer day encapsulated in a slice! Just picture yourself taking that first forkful, the creamy texture melting in your mouth, followed by the citrusy burst of orange—doesn’t it sound divine?
Moreover, orange creamsicle cheesecake is versatile. Whether you’re hosting a summer barbecue, celebrating a birthday, or just treating yourself on a Tuesday evening, this cheesecake fits the bill perfectly. It brings a cheerful, festive vibe to any table, reminding us of the sweet moments in life that deserve to be celebrated.
This dessert is not only about the flavor; it’s also about creating memories. Sharing a slice with family or friends can spark conversations about favorite childhood treats, bonding over the simple joys of life. So, let’s dive into what makes this orange creamsicle cheesecake truly special!
Essential Ingredients for Orange Creamsicle Cheesecake
Now that we’re all excited about making this delightful dessert, let’s gather our ingredients. Understanding each component will help you appreciate the flavors and ensure your cheesecake turns out perfectly every time. Here’s what you’ll need:
For the Crust:
- Graham Crackers: The classic cheesecake crust, adding a buttery, crunchy texture.
- Butter: Helps bind the crust together while adding richness.
- Sugar: A touch of sweetness to enhance the flavors.
For the Filling:
- Cream Cheese: The star of the show! It provides that rich, creamy texture we love in cheesecakes.
- Sour Cream: Adds tanginess and creaminess, making the filling smooth and luscious.
- Granulated Sugar: Sweetens the cheesecake without overpowering the orange flavor.
- Eggs: Help set the cheesecake as it bakes, creating that perfect creamy texture.
- Orange Zest: Freshly grated zest elevates the flavor profile, giving it a bright, citrusy punch.
- Orange Juice: Freshly squeezed juice infuses the cheesecake with a refreshing orange flavor.
- Vanilla Extract: Adds depth and enhances the orange and cream cheese flavors.
For Topping (Optional):
- Whipped Cream: A light and airy topping that complements the rich cheesecake.
- Orange Slices: Fresh slices make for a beautiful presentation.
- Zest: A sprinkle of zest can add a pop of color and flavor.
When sourcing your ingredients, try to use fresh oranges for the juice and zest. It makes a significant difference in flavor compared to bottled products. The vibrant taste of fresh orange zest and juice will transport your taste buds straight to summertime, making your cheesecake that much more delightful!
Step-by-Step Instructions for Making the Cheesecake
Now that we have our ingredients ready, it’s time to get our hands dirty and start baking! Here’s a simple step-by-step guide to making your orange creamsicle cheesecake. Don’t worry; it’s easier than you think!
Step 1: Preheat the Oven
Start by preheating your oven to 325°F (160°C). A preheated oven is essential for baking, as it helps the cheesecake set evenly.
Step 2: Make the Crust
- Prepare the Crust Mixture: In a mixing bowl, combine 1 ½ cups of crushed graham crackers, ¼ cup of granulated sugar, and ½ cup of melted butter. Stir until the mixture resembles wet sand.
- Press into the Pan: Press the graham cracker mixture firmly into the bottom of a 9-inch springform pan. You can use the bottom of a measuring cup to ensure an even layer.
- Bake the Crust: Bake the crust in the preheated oven for about 10 minutes or until lightly golden. Remove it from the oven and let it cool while you prepare the filling.
Step 3: Prepare the Cheesecake Filling
- Cream the Cheese: In a large mixing bowl, beat 24 ounces of cream cheese with an electric mixer until smooth and creamy. Make sure there are no lumps; this step is crucial for a silky filling.
- Add Sugar: Gradually add 1 cup of granulated sugar, mixing until well combined.
- Incorporate Eggs: Add 3 large eggs, one at a time, mixing on low speed after each addition. This ensures that you don’t overbeat the eggs, which can lead to cracks in your cheesecake.
- Mix in the Other Ingredients: Add 1 cup of sour cream, the zest of one orange, ½ cup of freshly squeezed orange juice, and 1 teaspoon of vanilla extract. Beat until the mixture is smooth and well combined.
Step 4: Bake the Cheesecake
- Pour the Filling: Pour the cheesecake filling into the cooled crust, smoothing the top with a spatula.
- Prepare for Baking: To prevent cracks, you can place a baking dish filled with water on the rack below your cheesecake while it bakes. This creates steam, helping to keep the cheesecake moist.
- Bake: Bake the cheesecake for about 60-70 minutes, or until the edges are set but the center is slightly jiggly. It will continue to set as it cools.
Step 5: Cool and Chill
- Turn Off the Oven: After the baking time, turn off the oven and crack the oven door open. Let the cheesecake cool in the oven for about an hour. This gradual cooling process helps prevent cracks.
- Chill: Once cooled, remove the cheesecake from the oven and refrigerate for at least 4 hours, or overnight for the best results.
Step 6: Serve
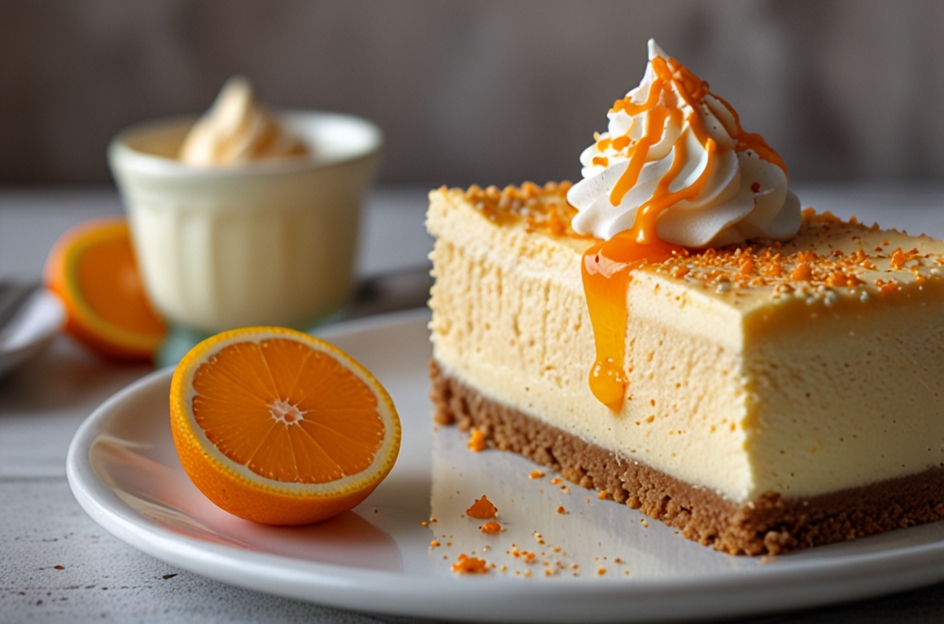
- Add Toppings: Before serving, whip some cream and spread it on top of the cheesecake. You can also garnish with fresh orange slices and a sprinkle of orange zest for that extra pop!
- Slice and Enjoy: Use a sharp knife to cut into slices, wiping the knife clean between cuts for neat slices. Serve chilled and enjoy!
And there you have it! Your homemade orange creamsicle cheesecake is ready to be devoured. Just be prepared for the compliments to roll in!
Tips and Tricks for the Perfect Cheesecake
Making a cheesecake may seem daunting, but with a few tips and tricks, you’ll be a pro in no time! Here are some handy pointers to ensure your orange creamsicle cheesecake turns out perfectly:
- Room Temperature Ingredients: Make sure your cream cheese and eggs are at room temperature. This helps them blend smoothly and avoids lumps in your filling.
- Don’t Overmix: Overmixing can introduce too much air into the batter, which can lead to cracks as it bakes. Mix until just combined.
- Water Bath: If you’re concerned about cracks, use a water bath (bain-marie) by wrapping the outside of your springform pan in foil and placing it in a larger baking dish filled with hot water while it bakes.
- Cool Gradually: Allow the cheesecake to cool slowly in the oven with the door ajar to prevent temperature shock, which can cause cracks.
- Chill Overnight: For the best texture and flavor, chill your cheesecake overnight. It gives the flavors time to meld and enhances the creamy consistency.
These tips will help you achieve that perfect, creamy cheesecake that everyone will rave about!
Variations on Orange Creamsicle Cheesecake
While the classic orange creamsicle cheesecake is absolutely delightful, there are countless variations you can try to keep things exciting! Here are a few ideas to inspire your creativity:
- Chocolate Drizzle: Add a drizzle of melted chocolate on top for a delicious contrast. The richness of chocolate pairs beautifully with the orange flavor.
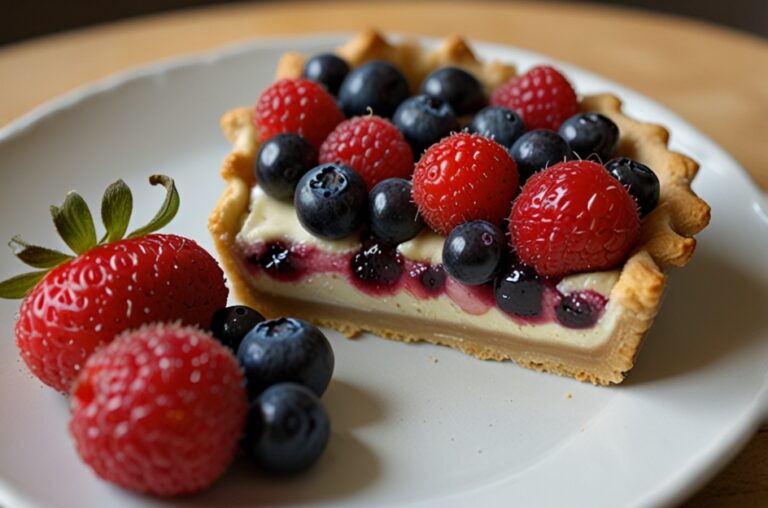
- Fruit Toppings: Experiment with different fruits! Try adding berries like strawberries or blueberries for a refreshing twist. You can even create a mixed berry compote to serve alongside.
- No-Bake Version: If you’re not in the mood to bake, you can make a no-bake version by using gelatin or whipped cream to set the cheesecake filling. This will give you a lighter texture while still capturing the delicious orange flavor.
- Orange Liqueur: For a grown-up twist, consider adding a splash of orange liqueur, like Grand Marnier or Cointreau, to the filling for an added depth of flavor.
- Ginger Snap Crust: Swap out the graham cracker crust for a ginger snap crust for a spiced flavor that complements the orange beautifully.
Feel free to mix and match these variations to suit your tastes or the occasion! After all, the beauty of making desserts is experimenting and having fun.
Serving Suggestions and Pairings
Once your orange creamsicle cheesecake is ready, it’s time to think about how to serve it. Here are some delightful serving suggestions and pairings that will elevate your dessert experience:
- Coffee or Tea: A slice of cheesecake pairs wonderfully with a cup of coffee or tea. The bitterness of coffee can balance out the sweetness of the cheesecake, making for a delightful combination.
- Fruit Salad: Serve your cheesecake with a side of fresh fruit salad. The natural sweetness and acidity of the fruits complement the creamy texture and citrus flavors of the cheesecake.
- Ice Cream: For an extra indulgent dessert, serve a scoop of vanilla or orange sorbet alongside your cheesecake. This adds a refreshing element that echoes the creamsicle theme.
- Chocolate Sauce: A drizzle of warm chocolate sauce over the top can add an unexpected yet delicious layer of flavor that complements the orange.
- Whipped Cream: Don’t forget the whipped cream! A dollop on each slice enhances the creaminess and adds a lightness to each bite.
No matter how you choose to serve your orange creamsicle cheesecake, these suggestions will ensure a delightful experience for you and your guests.
Storing and Reheating Your Cheesecake
If you find yourself with leftover cheesecake (which is rare, but it can happen!), proper storage is key to keeping it fresh and delicious. Here’s how to store and reheat your cheesecake:
Storing
- Refrigeration: Store your cheesecake in the refrigerator, covered with plastic wrap or in an airtight container. It can last up to one week, although the flavor is best within the first few days.
- Freezing: If you want to store it for longer, you can freeze the cheesecake. Wrap it tightly in plastic wrap and then in aluminum foil to prevent freezer burn. It can be frozen for up to three months. When you’re ready to enjoy it again, thaw it in the refrigerator overnight before serving.
Reheating
While cheesecake is typically enjoyed cold, if you prefer it slightly warm, you can reheat individual slices. Here’s how:
- Microwave: Place a slice on a microwave-safe plate and heat for about 15-20 seconds. Be careful not to overheat, as this can cause the texture to change.
- Oven: Preheat your oven to 200°F (93°C), place the cheesecake on an oven-safe dish, and warm it for about 10-15 minutes.
Remember, reheating should be done gently to maintain the cheesecake’s creamy texture and delicious flavor!
Conclusion
In conclusion, orange creamsicle cheesecake is a delightful dessert that combines nostalgia, flavor, and creativity in every slice. From its rich history to the simple yet delicious ingredients, this cheesecake is sure to impress anyone fortunate enough to indulge in it. Whether you’re preparing it for a special occasion or just a casual gathering, this dessert is bound to be a hit.
So, roll up your sleeves and get baking! With the tips, tricks, and variations provided, you can create your own perfect orange creamsicle cheesecake and share those joyful moments with family and friends. Don’t forget to enjoy the process and have fun experimenting with flavors along the way. Happy baking!
Frequently Asked Questions
What is the best way to prevent cracks in my cheesecake?
To prevent cracks, ensure you don’t overmix the batter, bake it at a low temperature, and allow it to cool gradually in the oven with the door ajar. Using a water bath can also help keep the cheesecake moist.
Can I make this cheesecake ahead of time?
Absolutely! You can make your cheesecake up to a day in advance. In fact, chilling it overnight enhances the flavor and texture, making it even more delicious.
What can I use instead of cream cheese?
For a lighter version, you can substitute cream cheese with mascarpone cheese or Greek yogurt. Just keep in mind that it may alter the flavor and texture slightly.
How do I know when my cheesecake is done?
Your cheesecake is done when the edges are set and the center is slightly jiggly. It will firm up as it cools.
Can I freeze leftovers?
Yes! You can freeze your cheesecake for up to three months. Just make sure to wrap it tightly to prevent freezer burn. Thaw it in the refrigerator before serving for the best texture.

