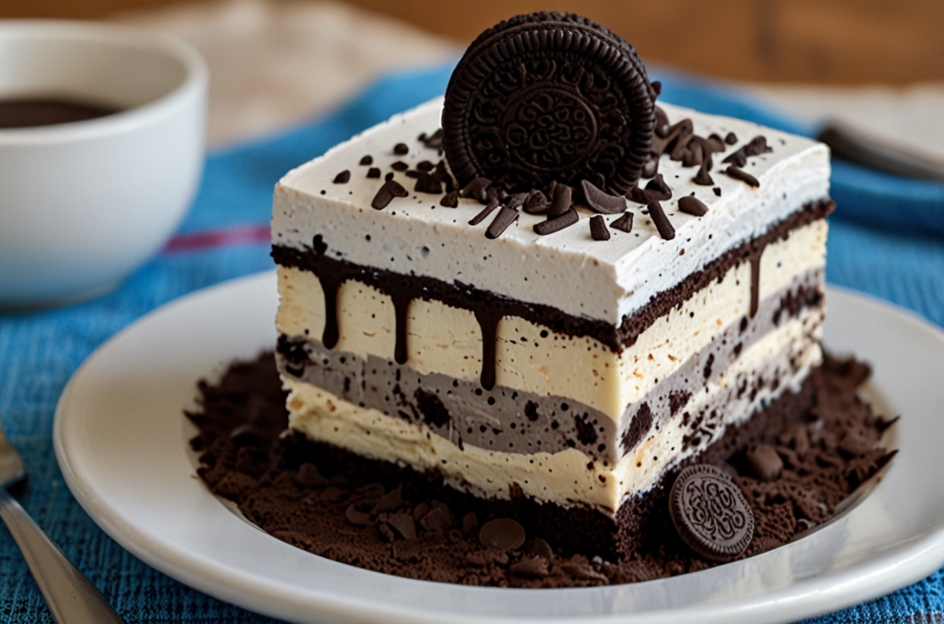
Oreo Ice Cream Cake: A Deliciously Decadent Treat
Who doesn’t love a good cake? Whether it’s for a birthday, an anniversary, or just a random Tuesday, cakes have a way of bringing joy into our lives. Now, imagine combining the classic flavors of Oreos with creamy, dreamy ice cream in one stunning dessert. That’s where the Oreo ice cream cake comes into play. This delightful creation not only tantalizes your taste buds but also becomes the centerpiece of any celebration. The best part? It’s incredibly easy to make and customizable to suit your preferences! In this article, we’ll explore everything you need to know about creating the perfect Oreo ice cream cake—from the history of this beloved dessert to step-by-step recipes, tips, and FAQs.
Table of Contents
| Sr# | Headings |
|---|---|
| 1 | The Origins of Oreo Ice Cream Cake |
| 2 | Essential Ingredients |
| 3 | Making Your Oreo Ice Cream Cake |
| 4 | Tips for the Perfect Texture |
| 5 | Flavor Variations |
| 6 | Creative Decorations |
| 7 | Serving and Storing Your Cake |
| 8 | Frequently Asked Questions |
The Origins of Oreo Ice Cream Cake
The Oreo cookie was first introduced in 1912, and since then, it has become a staple in the dessert world. The combination of chocolate and cream has been a fan favorite for generations, paving the way for various delicious inventions, including the Oreo ice cream cake. This dessert marries the rich, chocolatey flavor of Oreos with the smooth, creamy texture of ice cream, creating a dessert that is simply irresistible.
Think of the Oreo ice cream cake as the ultimate dessert chameleon. It adapts to any occasion, whether it’s a summer barbecue, a birthday party, or a cozy family gathering. Just like the Swiss army knife of desserts, it offers endless possibilities for flavors and presentations. Over the years, bakers and dessert lovers alike have embraced this treat, leading to countless variations that cater to different tastes and dietary preferences. From classic vanilla ice cream to unique flavors like mint chocolate chip or cookie dough, the possibilities are as diverse as the people who love it.
Essential Ingredients
Creating an Oreo ice cream cake requires just a handful of ingredients, making it a straightforward and fun dessert to prepare. Here’s what you’ll need:
- Oreos: These iconic cookies serve as both the crust and a delightful mix-in for the ice cream layers. Their rich chocolate flavor complements the creaminess of the ice cream beautifully.
- Ice Cream: You can use any flavor you desire! Classic options include vanilla or cookies and cream, but don’t be afraid to get creative. Try mint chocolate chip for a refreshing twist or salted caramel for a rich indulgence.
- Butter: Used to bind the crushed Oreos for the crust, butter adds a luscious richness to the cake.
- Whipped Topping or Whipped Cream: This adds a light, airy texture to your cake, enhancing its overall creaminess.
- Optional Toppings: Think of crushed Oreos, chocolate syrup, sprinkles, or even a drizzle of caramel sauce. These toppings add an extra layer of fun and flavor!
Now that we have our ingredients lined up, let’s dive into the making of the Oreo ice cream cake.
Making Your Oreo Ice Cream Cake
Creating your Oreo ice cream cake is like conducting a symphony; each layer plays a crucial role in producing a harmonious dessert experience. Here’s a step-by-step guide to help you get started:
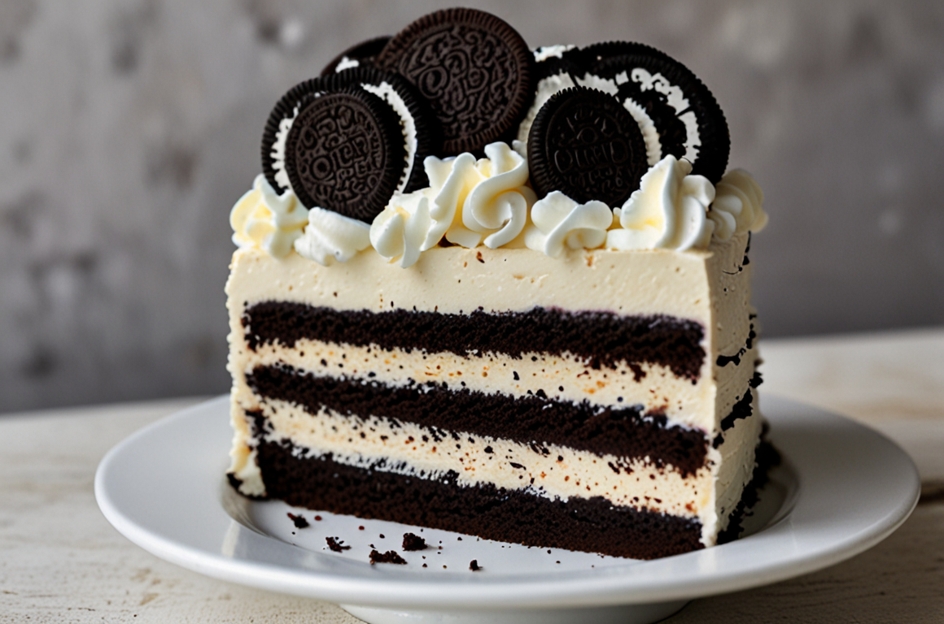
- Prepare the Crust: Start by crushing about 24 Oreos in a food processor or by placing them in a ziplock bag and crushing them with a rolling pin. You want them to be fine crumbs, resembling sand. Mix the crumbs with melted butter until the mixture resembles wet sand. Press the mixture firmly into the bottom of a 9-inch springform pan, creating an even layer. This will form the base of your cake.
- Add the Ice Cream Layer: Next, take your softened ice cream and scoop it over the Oreo crust. Spread it evenly using a spatula, making sure it reaches the edges. If you want a layered effect, you can alternate between flavors. For example, start with a layer of vanilla, freeze for a bit, then add a layer of cookies and cream.
- Freeze and Repeat: Once your first ice cream layer is in place, cover the cake with plastic wrap and freeze for at least 1 to 2 hours until firm. After the first layer is set, you can repeat the process by adding another layer of crushed Oreos and another layer of ice cream.
- Top It Off: After you’ve added your final layer of ice cream, spread a layer of whipped topping or whipped cream over the top. This gives your cake a lovely, frosted appearance. For a finishing touch, sprinkle crushed Oreos and drizzles of chocolate syrup on top.
- Freeze and Serve: Cover the cake with plastic wrap and freeze it for at least 4 hours or overnight. When you’re ready to serve, remove the cake from the freezer and let it sit for about 10 minutes at room temperature for easier slicing.
And voilà! You’ve just created a stunning Oreo ice cream cake that will impress family and friends alike.
Tips for the Perfect Texture
Getting the texture just right is essential for a successful Oreo ice cream cake. Here are some tips to ensure your cake turns out perfectly every time:
- Softened Ice Cream: Before layering, let your ice cream sit out for about 10-15 minutes. This makes it easier to spread and helps avoid ice crystals, resulting in a smoother texture.
- Freezing Time: Don’t rush the freezing process. Giving each layer enough time to set is crucial. It ensures that the layers stay distinct and don’t mix together.
- Crushed Oreos: For the crust, be sure to crush the Oreos finely. Large chunks can make it difficult to form a solid crust. Consider using a food processor for the best results.
- Whipped Cream: For a light and airy texture, use heavy whipping cream for your whipped topping. It holds its shape better and adds a delightful lightness to the cake.
- Room Temperature for Slicing: Allow the cake to sit at room temperature for a few minutes before slicing. This softens the ice cream slightly, making it easier to cut cleanly.
Flavor Variations
While the classic Oreo ice cream cake is a hit, you can easily customize the flavors to suit your taste or celebrate the seasons. Here are some ideas to inspire your creativity:
- Mint Chocolate Oreo Cake: Use mint chocolate chip ice cream and add crushed mint Oreos. This refreshing twist is perfect for summer gatherings.
- Peanut Butter Cup Delight: Swap out the regular Oreos for peanut butter Oreos and use peanut butter ice cream. You can even add chopped peanut butter cups for an extra treat.
- Fruit Fusion: Incorporate layers of fruit-flavored ice cream like strawberry or raspberry. Pair it with a chocolate Oreo crust for a delightful contrast.
- Coffee Lover’s Dream: Use coffee-flavored ice cream and top with chocolate-covered espresso beans for an adult twist on this classic dessert.
- Seasonal Sensations: For the holidays, try pumpkin or eggnog-flavored ice cream and incorporate seasonal spices like cinnamon and nutmeg. This adds a festive touch to your cake.
The beauty of the Oreo ice cream cake is its versatility—feel free to experiment until you find your perfect combination!
Creative Decorations
Presentation is key when it comes to cakes, and an Oreo ice cream cake is no exception. Here are some creative decoration ideas to make your cake visually appealing:
- Chocolate Drizzle: Use melted chocolate or chocolate syrup to create a drizzle effect on the top of your cake. This adds a beautiful shine and makes the cake look extra indulgent.
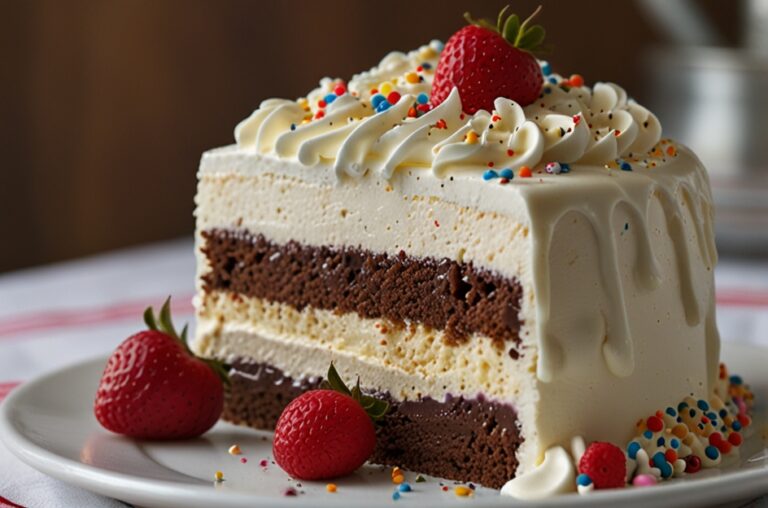
- Whipped Cream Swirls: Use a piping bag to create decorative swirls or rosettes of whipped cream around the edge of the cake. This adds elegance and makes it look professionally made.
- Oreo Crumbles: For an extra touch of Oreo goodness, sprinkle crushed Oreos on top or along the sides of the cake. This not only looks great but also enhances the flavor.
- Fruit Garnish: If you’ve added fruit-flavored layers, consider garnishing the top with fresh berries. They add a pop of color and a refreshing touch.
- Themed Decorations: If the cake is for a special occasion, consider adding themed decorations like candles, edible glitter, or sprinkles in matching colors. This makes the cake even more festive.
Remember, the key is to have fun and express your creativity when decorating your cake!
Serving and Storing Your Cake
Now that you’ve made and beautifully decorated your Oreo ice cream cake, it’s time to enjoy it! Here are some tips for serving and storing:
- Serving Size: An Oreo ice cream cake is rich and creamy, so a little goes a long way. Consider cutting it into smaller slices to serve. You can always go back for seconds!
- Storage: Store any leftovers in the freezer, tightly wrapped to prevent freezer burn. The cake can last up to a week, but for the best taste and texture, try to consume it within a few days.
- Thawing: If you take the cake out of the freezer, let it thaw for about 10 minutes before serving. This will help soften the ice cream for easier slicing.
- Make Ahead: The beauty of this dessert is that you can make it in advance. Just remember to allow ample time for freezing so it’s ready for your event!
Frequently Asked Questions
What is an Oreo ice cream cake made of?
An Oreo ice cream cake is made of layers of crushed Oreo cookies, ice cream, and whipped cream. It typically features an Oreo crust at the bottom, followed by layers of ice cream (any flavor), and is topped with whipped cream and crushed Oreos for decoration.
Can I use homemade ice cream?
Absolutely! Homemade ice cream works wonderfully in this recipe. Just make sure it’s soft enough to spread easily and holds its shape once frozen.
How long can I store an Oreo ice cream cake?
You can store it in the freezer for up to a week. For the best flavor and texture, try to enjoy it within a few days of making it.
Can I use gluten-free Oreos?
Yes, gluten-free Oreos are a fantastic option if you have dietary restrictions. They will work just as well in the recipe.
Can I make this cake without a springform pan?
Yes, you can use any cake pan; just line it with parchment paper for easy removal. However, a springform pan makes it easier to release the cake without damaging it.
Conclusion
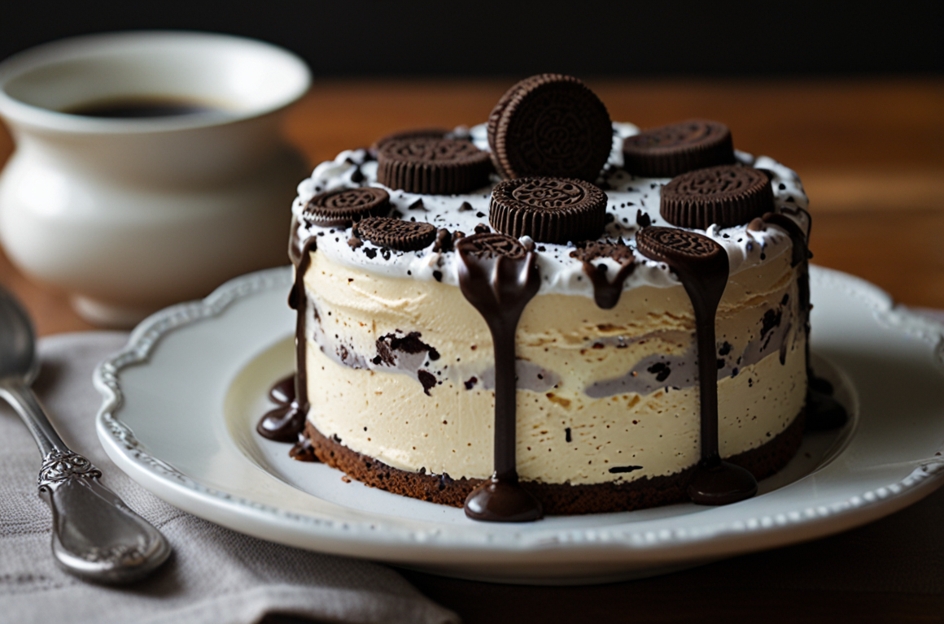
The Oreo ice cream cake is more than just a dessert; it’s a delightful experience that brings people together, creating sweet memories with every slice. With its rich layers of Oreos and creamy ice cream, it appeals to both the young and the young at heart. Whether you’re hosting a party or enjoying a quiet evening at home, this cake is the perfect treat to indulge in. So gather your ingredients, unleash your creativity, and create a stunning Oreo ice cream cake that will leave everyone craving more!

