new york cheesecake recipe
Indulging in a rich and creamy slice of New York cheesecake is like a hug for your taste buds. This dessert isn’t just a treat; it’s an experience that combines a buttery graham cracker crust with a velvety filling that melts in your mouth. If you’ve ever wondered how to recreate that iconic dessert at home, you’ve come to the right place! In this article, we will guide you through the traditional New York cheesecake recipe, explore its history, and offer tips and tricks to make your cheesecake the star of any gathering. Let’s dive into the world of cheesecakes!
Table of Contents
| Sr# | Headings |
|---|---|
| 1 | Understanding New York Cheesecake |
| 2 | The Ingredients You Need |
| 3 | Preparing the Crust |
| 4 | Making the Cheesecake Filling |
| 5 | Baking the Cheesecake |
| 6 | Cooling and Serving Tips |
| 7 | Variations of New York Cheesecake |
| 8 | Storing Your Cheesecake |
| 9 | Conclusion |
| 10 | FAQs |
Understanding New York Cheesecake
When it comes to cheesecakes, New York cheesecake reigns supreme. Known for its dense, creamy texture, this style of cheesecake is distinct from others due to its use of cream cheese, which provides a rich and indulgent flavor. But why is it so special? Imagine the difference between a pillow and a mattress; both offer comfort, but one envelops you in luxurious softness while the other provides support. Similarly, New York cheesecake wraps you in its creamy goodness, while other cheesecakes might leave you feeling light and airy.
New York cheesecake has roots dating back to ancient Greece, but it found its identity in the Big Apple. The cheesecake we enjoy today is believed to have been popularized in the early 1900s, with recipes evolving over the decades. The classic cheesecake is simple yet sophisticated, making it a favorite for celebrations, holidays, and even just a comforting dessert after a long day.
The Ingredients You Need
To create the perfect New York cheesecake, you’ll need to gather the right ingredients. Think of this step as assembling your toolkit before starting a DIY project. Here’s what you’ll need:
- Crust:
- 1 ½ cups graham cracker crumbs
- ½ cup granulated sugar
- ½ cup unsalted butter, melted
- Filling:
- 4 (8-ounce) packages cream cheese, softened
- 1 cup granulated sugar
- 1 teaspoon vanilla extract
- 4 large eggs
- 1 cup sour cream
- ½ cup heavy cream
This list may look simple, but each ingredient plays a vital role in crafting that beloved cheesecake texture and flavor. The graham cracker crust adds a delightful crunch that contrasts beautifully with the creamy filling, while the combination of cream cheese and sour cream creates a rich, tangy flavor that dances on your palate.
Preparing the Crust
Now that you have your ingredients ready, it’s time to prepare the crust. Think of the crust as the foundation of a house; without a sturdy base, everything else falls apart. Here’s how to make the perfect crust:
- Combine the Ingredients: In a medium mixing bowl, combine the graham cracker crumbs, sugar, and melted butter. Mix until the crumbs are evenly coated and the mixture resembles wet sand.
- Press the Crust: Pour the crumb mixture into a 9-inch springform pan. Using your fingers or the bottom of a measuring cup, press the mixture firmly into the bottom and slightly up the sides of the pan. This helps create a solid base for your cheesecake.
- Pre-Bake the Crust: Preheat your oven to 350°F (175°C). Place the crust in the oven for about 10 minutes, or until lightly golden. This step is crucial because it helps the crust set, preventing it from becoming soggy once the filling is added.
- Cool the Crust: After baking, remove the crust from the oven and let it cool completely before adding the filling. A warm crust can affect the baking process, leading to cracks in your cheesecake.
Making the Cheesecake Filling
With your crust prepared, it’s time to move on to the star of the show—the cheesecake filling. The process is simple and straightforward, making it accessible even for novice bakers. Here’s how to do it:

- Beat the Cream Cheese: In a large mixing bowl, beat the softened cream cheese with an electric mixer until it’s smooth and creamy. This step is crucial; if the cream cheese isn’t softened properly, you may end up with lumps in your filling.
- Add Sugar and Vanilla: Gradually add in the granulated sugar and vanilla extract, continuing to mix until fully combined. You should achieve a silky-smooth consistency that’s free of any lumps.
- Incorporate the Eggs: Add the eggs, one at a time, mixing on low speed after each addition. This method prevents the eggs from incorporating too much air, which can lead to cracks during baking.
- Mix in Sour Cream and Heavy Cream: Finally, gently fold in the sour cream and heavy cream. This combination not only adds creaminess but also enhances the cheesecake’s flavor profile.
- Check the Consistency: The filling should be thick and creamy, similar to the texture of soft serve ice cream. If it’s too runny, your cheesecake may not set properly.
Baking the Cheesecake
Now that you have your filling ready, it’s time to bake the cheesecake. Baking is where the magic happens, transforming your ingredients into the luscious dessert we all love. Here’s how to ensure a successful bake:
- Prepare for Water Bath: To prevent cracks, consider using a water bath. Wrap the outside of the springform pan with aluminum foil to prevent water from seeping in. Place the pan in a larger baking dish, and fill the dish with hot water until it reaches about halfway up the sides of the springform pan.
- Bake: Pour the filling into the cooled crust, smoothing the top with a spatula. Bake in a preheated oven at 325°F (160°C) for 55-70 minutes. The edges should be set, while the center remains slightly jiggly. Remember, the cheesecake will continue to firm up as it cools.
- Turn Off the Oven: Once baked, turn off the oven and crack the oven door open. Let the cheesecake sit in the oven for about an hour. This gradual cooling process helps prevent sudden temperature changes that can lead to cracks.
- Cool at Room Temperature: After an hour, remove the cheesecake from the oven and let it cool to room temperature. This step is essential for ensuring a smooth and creamy texture.
Cooling and Serving Tips
Once your cheesecake has cooled, it’s time to think about serving. This step is like the icing on the cake—how you present your dessert can make all the difference. Here’s how to do it right:
- Chill: Cover the cheesecake with plastic wrap and refrigerate for at least 4 hours, preferably overnight. This chilling time allows the flavors to meld and the texture to set properly.
- Remove from Pan: When you’re ready to serve, carefully remove the sides of the springform pan. Run a thin knife around the edges to help release the cheesecake without damaging it.
- Slice with Care: For clean slices, dip your knife in hot water and wipe it dry before each cut. This technique helps to keep the edges smooth and prevents the filling from sticking to the knife.
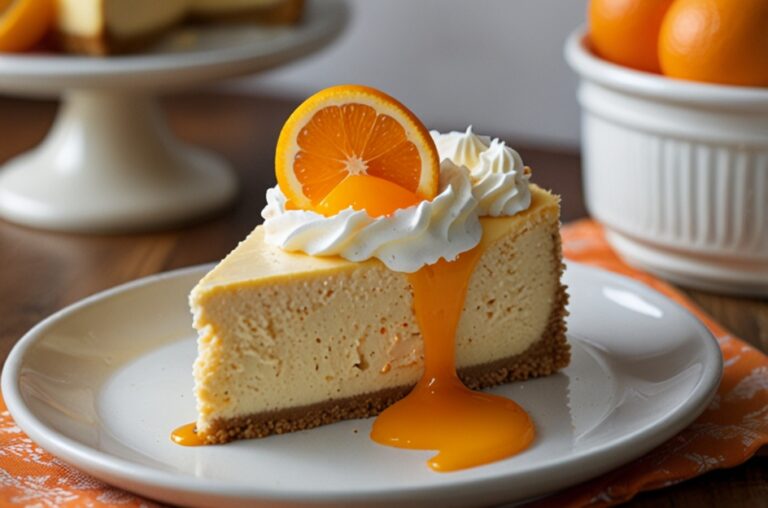
- Garnish: While New York cheesecake is delightful on its own, consider adding a garnish. Fresh berries, whipped cream, or a drizzle of chocolate sauce can elevate your dessert and add a pop of color.
- Serve: Plate your cheesecake and serve it to your eager guests. Watch as their faces light up with joy when they take that first bite!
Variations of New York Cheesecake
While the classic New York cheesecake is a timeless favorite, there’s no limit to the variations you can explore. Here are a few ideas to spark your creativity:
- Fruit Toppings: Top your cheesecake with fresh fruits like strawberries, blueberries, or raspberries for a burst of flavor and color.
- Chocolate Swirl: For chocolate lovers, swirl in melted chocolate before baking for a delicious twist.
- Pumpkin Cheesecake: Add pumpkin puree and spices for a seasonal variation that’s perfect for fall.
- Lemon Zest: Incorporate lemon zest into the filling for a refreshing citrus flavor that balances the richness of the cheesecake.
- Nut Crust: Experiment with different crusts by using crushed nuts instead of graham crackers for added texture and flavor.
These variations allow you to personalize your cheesecake to suit any occasion or preference. The beauty of cheesecake is its versatility; you can play with flavors and toppings while still maintaining the classic characteristics.
Storing Your Cheesecake
Once you’ve made your delicious New York cheesecake, you’ll want to ensure it stays fresh for as long as possible. Here are some tips on how to store your cheesecake properly:
- Refrigerate: Store your cheesecake in the refrigerator if you plan to consume it within a few days. Cover it tightly with plastic wrap or aluminum foil to prevent it from absorbing any odors from other foods.
- Freezing: If you want to keep your cheesecake for an extended period, you can freeze it. Wrap it securely in plastic wrap, then in aluminum foil to protect it from freezer burn. It can be frozen for up to three months.
- Thawing: To thaw a frozen cheesecake, transfer it to the refrigerator for several hours or overnight. Avoid thawing it at room temperature, as this can lead to a soggy texture.
By following these storage tips, you can enjoy your homemade cheesecake for days or even months to come!

Conclusion
In conclusion, making a New York cheesecake is a delightful endeavor that combines simple ingredients and techniques to create a dessert that’s sure to impress. Whether you’re celebrating a special occasion or simply craving a slice of something sweet, this cheesecake recipe is a go-to choice. Remember, the key to a successful cheesecake lies in the details—from preparing the crust to the baking process. With a little patience and practice, you’ll be well on your way to mastering the art of cheesecake-making. So gather your ingredients, roll up your sleeves, and get ready to indulge in a slice of heaven!
FAQs
What’s the difference between New York cheesecake and regular cheesecake?
New York cheesecake is denser and creamier than regular cheesecake, primarily due to its use of cream cheese and sour cream. Regular cheesecake may use ricotta or other cheeses, resulting in a lighter texture.
Can I make cheesecake without a springform pan?
Yes, you can use a regular cake pan, but it may be more challenging to remove the cheesecake. Line the pan with parchment paper for easier removal.
How can I prevent cracks in my cheesecake?
To prevent cracks, ensure your ingredients are at room temperature, avoid overmixing, and use a water bath during baking. Gradually cooling the cheesecake also helps.
What toppings can I use for cheesecake?
Common toppings include fresh fruit, whipped cream, chocolate ganache, or caramel sauce. You can get creative with flavors to match your taste preferences.
Can I use low-fat cream cheese?
While low-fat cream cheese can be used, it may alter the texture and flavor. For the best results, stick to full-fat cream cheese for a rich and creamy cheesecake.


