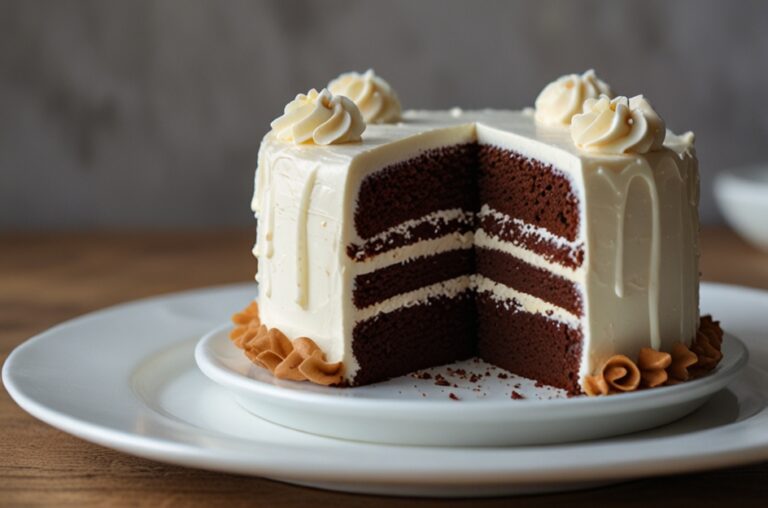
halloween cake pops
When Halloween rolls around, we often think of spooky costumes, haunted houses, and, of course, a mountain of candy. But why stop there? This festive season also brings a chance to get creative in the kitchen with Halloween cake pops! These delightful treats not only satisfy your sweet tooth but also add a playful touch to any Halloween celebration. They’re easy to make, customizable, and, let’s face it, irresistibly cute! In this article, we’ll dive into everything you need to know about creating these festive bites of joy, including recipes, decorating ideas, and fun tips to make your Halloween even sweeter.
| Sr# | Headings |
|---|---|
| 1 | What Are Halloween Cake Pops? |
| 2 | Essential Ingredients for Cake Pops |
| 3 | The Step-by-Step Process of Making Cake Pops |
| 4 | Fun and Creative Decorating Ideas |
| 5 | Halloween Cake Pop Variations |
| 6 | Tips for Storing and Serving Cake Pops |
| 7 | How to Make Halloween Cake Pops with Kids |
| 8 | The History and Popularity of Cake Pops |
What Are Halloween Cake Pops?
Halloween cake pops are miniature cakes that are crumbled, mixed with frosting, and then shaped into balls before being coated in chocolate or candy melts. These bite-sized desserts are typically placed on a stick, making them easy to hold and eat. The beauty of cake pops lies in their versatility—like a canvas waiting for an artist’s touch, you can transform them into various spooky shapes and characters, from ghoulish ghosts to pumpkin heads. But why are these little wonders so popular during Halloween?
Imagine walking into a party filled with laughter, the smell of fall spices wafting through the air, and your eyes landing on a platter adorned with vibrant cake pops. They’re not just sweets; they’re a feast for the eyes! Each pop can be crafted to fit your theme, making them an excellent addition to Halloween festivities. They evoke the spirit of the season while being incredibly fun to eat. Whether you’re hosting a Halloween party, attending a potluck, or simply want to surprise your family with a treat, Halloween cake pops are sure to be a hit. Plus, they can be made in advance and stored until you’re ready to unveil them.
Essential Ingredients for Cake Pops
Creating the perfect Halloween cake pops starts with gathering your ingredients. While the basic recipe remains the same, you can customize it according to your preferences or dietary restrictions. Here’s a rundown of the essential ingredients you’ll need:
- Cake: You can use any cake flavor you like—chocolate, vanilla, or even red velvet! You could even use store-bought cakes or cake mixes for convenience.
- Frosting: This binds the crumbled cake together. Cream cheese frosting works well for a rich flavor, while buttercream provides a classic sweetness. Use about 1 cup of frosting for every 1 layer of cake.
- Chocolate or Candy Melts: These are used to coat the cake pops. You can choose white chocolate, milk chocolate, or colored candy melts for a festive touch.
- Lollipop Sticks: These are essential for holding your cake pops together. They come in various lengths, so choose what works best for your design.
- Sprinkles and Edible Decorations: These are optional but can add a fun touch. Look for Halloween-themed sprinkles, such as bats, ghosts, and pumpkin shapes, to elevate your pops.
With these basic ingredients, you can create a variety of flavors and styles. The key is to have fun experimenting with different combinations!
The Step-by-Step Process of Making Cake Pops
Making Halloween cake pops may seem daunting at first, but it’s a straightforward process that yields delightful results. Here’s a step-by-step guide to help you through:
- Bake the Cake: Begin by baking your cake according to the recipe or package instructions. Allow it to cool completely before proceeding to the next step.
- Crumble the Cake: Once cooled, crumble the cake into a large mixing bowl using your hands or a fork. Aim for a fine crumb, as larger pieces can lead to uneven pops.
- Mix in the Frosting: Gradually add the frosting to the crumbled cake, mixing with your hands until the mixture holds together. You want a dough-like consistency—if it feels too dry, add more frosting.
- Shape the Cake Balls: Take small amounts of the mixture and roll them into balls, about 1 inch in diameter. Place them on a baking sheet lined with parchment paper.
- Chill the Cake Balls: Refrigerate the shaped cake balls for about 30 minutes. This helps them firm up, making them easier to coat.
- Melt the Chocolate: While the cake balls are chilling, melt your chocolate or candy melts according to package instructions. Use a microwave or a double boiler for best results.
- Dip the Sticks: Dip the end of a lollipop stick into the melted chocolate, then insert it into the center of a cake ball. This will help secure the stick when you dip the entire pop.
- Coat the Cake Pops: Dip each cake ball into the melted chocolate, allowing the excess to drip off. You can also use a spoon to help coat them evenly.
- Decorate: Before the coating sets, sprinkle your favorite decorations over the top. Be creative—this is your chance to bring the Halloween theme to life!
- Set the Pops: Place the coated cake pops upright in a styrofoam block or a cake pop stand to allow them to set completely.
And there you have it! Simple steps to create delightful cake pops that are sure to enchant your friends and family.
Fun and Creative Decorating Ideas
What’s Halloween without a little creativity? Decorating your cake pops is where the magic happens. Here are some fun and creative ideas to get you started:

- Ghostly Cake Pops: Dip your cake pops in white chocolate, then use mini chocolate chips to create eyes. They’ll look like cute little ghosts that your guests will adore!
- Pumpkin Pops: Use orange candy melts to coat your cake balls. Before the coating sets, place a green gummy candy or fondant piece on top to create a pumpkin stem.
- Monster Pops: Coat your cake pops in green candy melts, then use candy eyes and other edible decorations to create funny monster faces. This is a great opportunity to let your kids join in on the fun!
- Spider Cake Pops: Dip your cake pops in black chocolate or candy melts. Use licorice or chocolate sticks to create legs and candy eyes to complete the creepy look.
- Mummy Cake Pops: Coat your cake pops in white chocolate and then drizzle melted chocolate over the top to create a mummy-like effect. Add candy eyes to bring them to life!
Decorating is a chance to let your imagination run wild! Think of Halloween characters, spooky themes, and fun designs. Not only will they look amazing, but they’ll also taste incredible!
Halloween Cake Pop Variations
While traditional cake pops are delicious, don’t hesitate to explore different flavor combinations and styles. Here are some ideas to inspire you:
- Red Velvet Cake Pops: For a twist on the classic, use red velvet cake combined with cream cheese frosting. The striking red color makes for a visually stunning treat.
- Carrot Cake Pops: Use moist carrot cake and cream cheese frosting for a delightful autumn flavor. Coat them in white chocolate and sprinkle some cinnamon on top for an extra kick.
- Chocolate Mint Cake Pops: Add mint extract to your chocolate cake batter for a refreshing twist. Dip in dark chocolate and sprinkle crushed mint candies for garnish.
- Gluten-Free Cake Pops: For those with dietary restrictions, substitute gluten-free cake mix and frosting. You can still enjoy the joy of cake pops without sacrificing flavor!
- Vegan Cake Pops: Create vegan cake pops using plant-based ingredients. Substitute eggs and dairy products with alternatives like flaxseed and almond milk for a delicious and guilt-free treat.
Exploring these variations can be a fun way to tailor your cake pops to your audience’s preferences. Who doesn’t love a little variety on the dessert table?
Tips for Storing and Serving Cake Pops
Once you’ve created your Halloween cake pops, it’s important to know how to store them properly to maintain their freshness. Here are some tips:
- Storing Cake Pops: Keep your cake pops in an airtight container in the refrigerator if you’re not serving them immediately. They can last for up to a week, but be sure to keep them separated with parchment paper to prevent sticking.
- Freezing Cake Pops: If you want to make them ahead of time, cake pops can be frozen. Place them in a single layer on a baking sheet until frozen solid, then transfer to a freezer-safe container. They can last for about a month in the freezer.
- Serving Suggestions: For a fun serving idea, create a Halloween-themed display. Use a spooky platter or stand, and consider adding props like plastic spiders or small pumpkins to enhance the presentation.
- Room Temperature: If serving at a party, allow the cake pops to sit at room temperature for about 30 minutes before serving. This will ensure the coating is soft and pleasant to bite into.
- Labeling: If you’ve made various flavors, consider labeling them for guests. You can use small flags or tags attached to the sticks to identify the different flavors.
These tips will help ensure your cake pops are not only delicious but also visually appealing when served.
How to Make Halloween Cake Pops with Kids
Making Halloween cake pops can be a fun activity to do with kids. It’s an excellent opportunity for them to express their creativity while developing some kitchen skills. Here are a few tips to make the process enjoyable and safe:
- Prep Work: Before inviting your kids into the kitchen, do some of the prep work yourself. Bake the cake, crumble it, and mix in the frosting. This will help minimize mess and make the activity more enjoyable for them.
- Let Them Decorate: Kids love to get creative! Allow them to dip the cake balls in chocolate and decorate with sprinkles or edible eyes. This is where their imaginations can run wild!
- Safety First: Be cautious with melted chocolate and hot surfaces. Supervise them closely, especially when handling sharp tools like knives or hot equipment.
- Create a Theme: To make the activity even more fun, consider creating a Halloween theme. Perhaps you can all dress up in costumes while you bake and decorate!
- Celebrate the Final Product: Once the cake pops are done, have a mini celebration. Gather the family together to taste-test the creations and see who made the spookiest pop.
By involving kids in the process, not only will they learn valuable skills, but they’ll also create lasting memories and have a blast celebrating Halloween!
The History and Popularity of Cake Pops

Have you ever wondered where cake pops came from? These delightful treats may seem like a recent trend, but they have roots dating back centuries. The concept of crumbling cake and mixing it with frosting is not new; many cultures have their versions of cake balls. However, the modern cake pop as we know it gained popularity in the early 2000s thanks to Bakerella, a popular food blogger who showcased them in various forms.
Since then, cake pops have become a staple at parties, weddings, and celebrations, particularly during Halloween. Their small size makes them perfect for sharing, and the ability to customize them to fit any theme has only added to their appeal. Today, cake pops are not just desserts—they’re a canvas for creativity, allowing bakers to showcase their skills while delighting friends and family with unique and tasty treats.
As you can see, Halloween cake pops are not just a passing trend but a beloved treat that brings joy and creativity into the kitchen. Their history, coupled with their ability to adapt to modern tastes, makes them a must-try this Halloween season.
Conclusion
In summary, Halloween cake pops are a delightful addition to your Halloween celebrations. With their easy-to-follow recipes, endless decorating options, and the opportunity to engage with family and friends in the kitchen, these treats are sure to be a hit. So, gather your ingredients, unleash your creativity, and get ready to create a sweet surprise this Halloween!
FAQs
What is the best way to melt chocolate for cake pops?
The best way to melt chocolate is to use a microwave or a double boiler. If using a microwave, heat in short bursts (about 30 seconds) and stir in between until fully melted. For a double boiler, place the chocolate in a heatproof bowl over simmering water and stir until melted.
Can I use leftover cake for cake pops?
Absolutely! Leftover cake is perfect for cake pops. Simply crumble it, mix with frosting, and follow the regular process.
How do I get smooth chocolate coating on my cake pops?
To achieve a smooth coating, ensure the chocolate is completely melted and at a warm temperature. Dip quickly, allowing excess chocolate to drip off, and tap gently to remove any bubbles.
Can I make cake pops in advance?
Yes! You can make cake pops ahead of time. They can be stored in the fridge for up to a week or frozen for up to a month.
What are some flavor combinations for cake pops?
The possibilities are endless! Some popular combinations include chocolate cake with peanut butter frosting, vanilla cake with chocolate frosting, or carrot cake with cream cheese frosting.


